How To Set Hosting Environment to Development
When writing an asp.net core application you often need to be able to perform some operations in a development environment that you would not perform in production. This could be for the purposes of debugging or for performance. It could also be that you need to be able to test various features or provide new features in development that you do not want in the release or production environment.
The dotnet core environment makes it easy to determine the current environment and has some built in environments that you can use. Two of these are the Development environment and the Production environment. As you can guess, the Development environment is for when you are running your code in a development environment. If the current environment cannot be determined then it will default to Production.
When running an asp.net site in IIS you may want to set the environment to Development for a specific site. If you want the entire server environment to run in Development then you can add a system environment variable. The name of the variable to set is ASPNETCORE_ENVIRONMENT and you simply set the value to, you guessed it, Development.
Setting the variable for one particular site on your IIS to run in this mode is easier and less disruptive.
Find Your Site
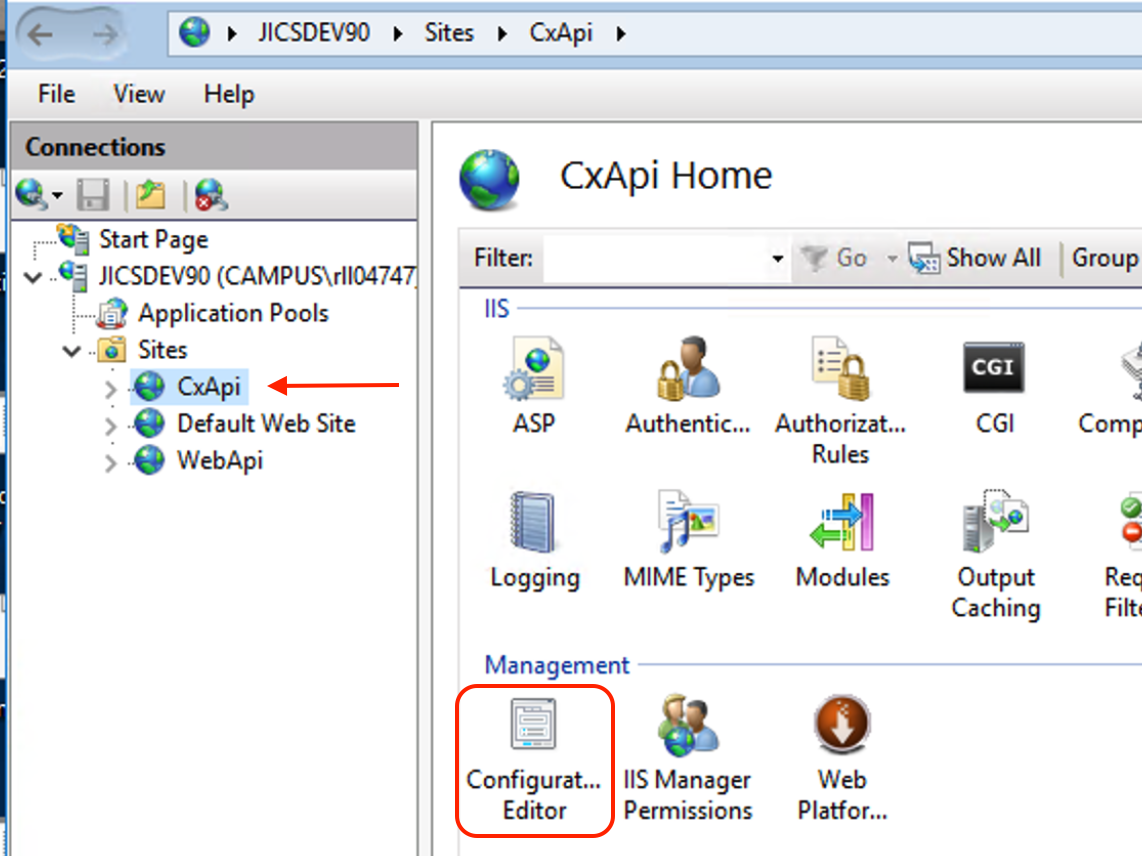
Start by opening the IIS Manager. Then select the site for which you want to modify the environment variable. This will bring up the panel of options on the right which includes the "Configuration Editor" under "Management" section. Click on this to open it.

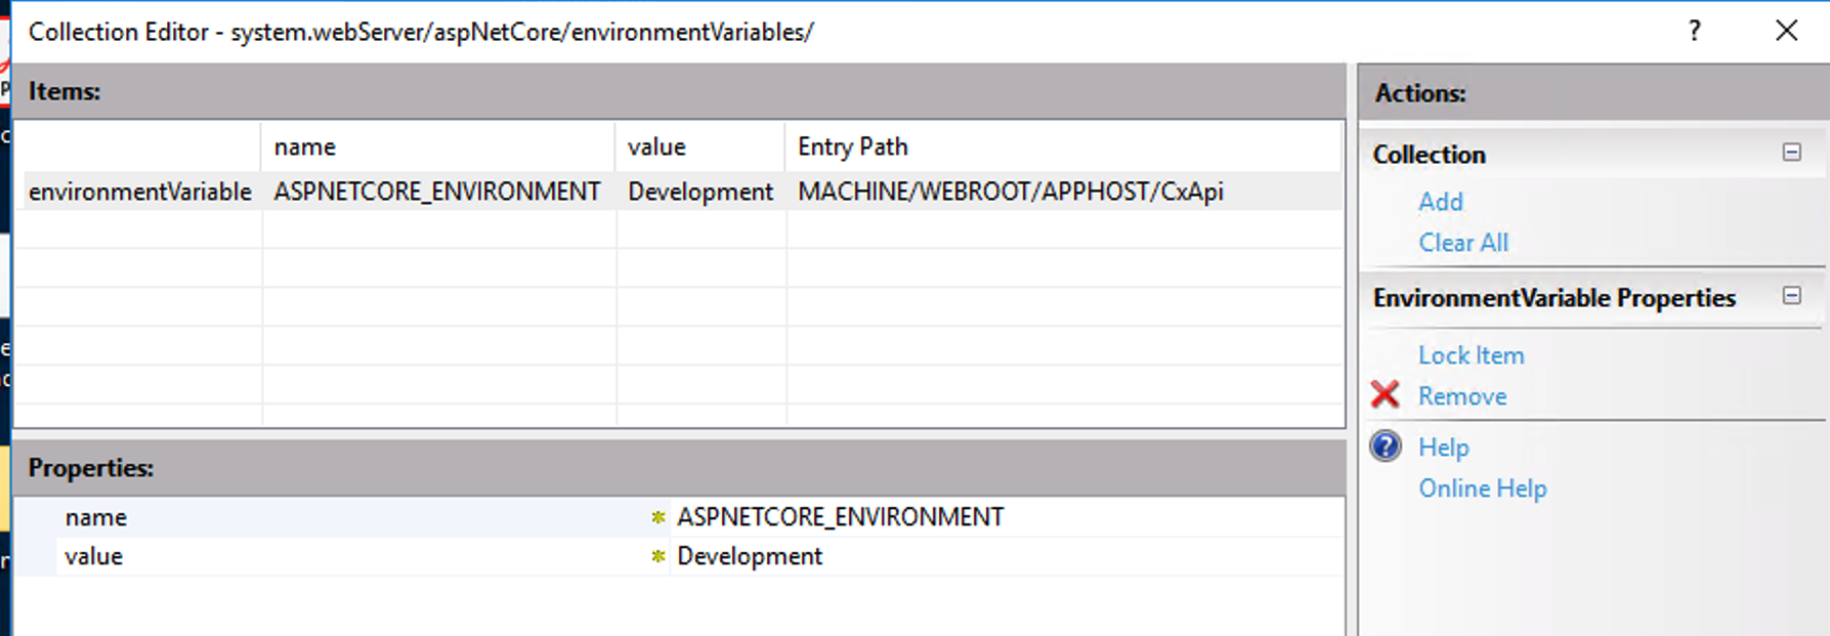
Once open select the system.webServer/aspNetCore section and then select the environmentVariables item from the list. On the right will be a small button with an ellipsis, click on that to open an additional window called the Collection Editor for editing the variables.
Add the variable
In the new Collection Editor window click the "Add" button on the right side under "Actions". This will add a new environment variable to be set. In the "Properties" section there is a "name" and a "value" row. In the "name" row set the name of the variable to ASPNETCORE_ENVIRONMENT. For the value set it to Development. You can set the variable to any value. However, the dot net core environment will only recognized a few pre-defined values. If you choose a non-standard value you will need to look for it specifically in your code.

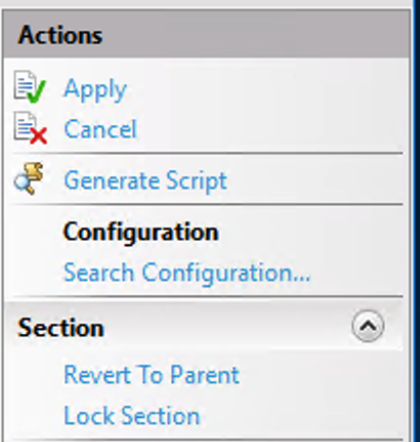
After setting the name and value close the Collection Editor window. Now click the Apply button under the "Actions" section to apply your changes.

Restart The Site
When making a change to the environment variable for the site you are really just putting an entry into the local web.config. When you save the changes to the web.config this triggers IIS to reload the web.config. This means that you do not need to do anything special to get the new variable to take effect.
If for some reason you are not seeing the results you expect you can restart the Application Pool that the site is in to trigger the reload.
You must be logged in to see the comments. Log in now!